Downstairs Renovations - Wet & Dry Bar
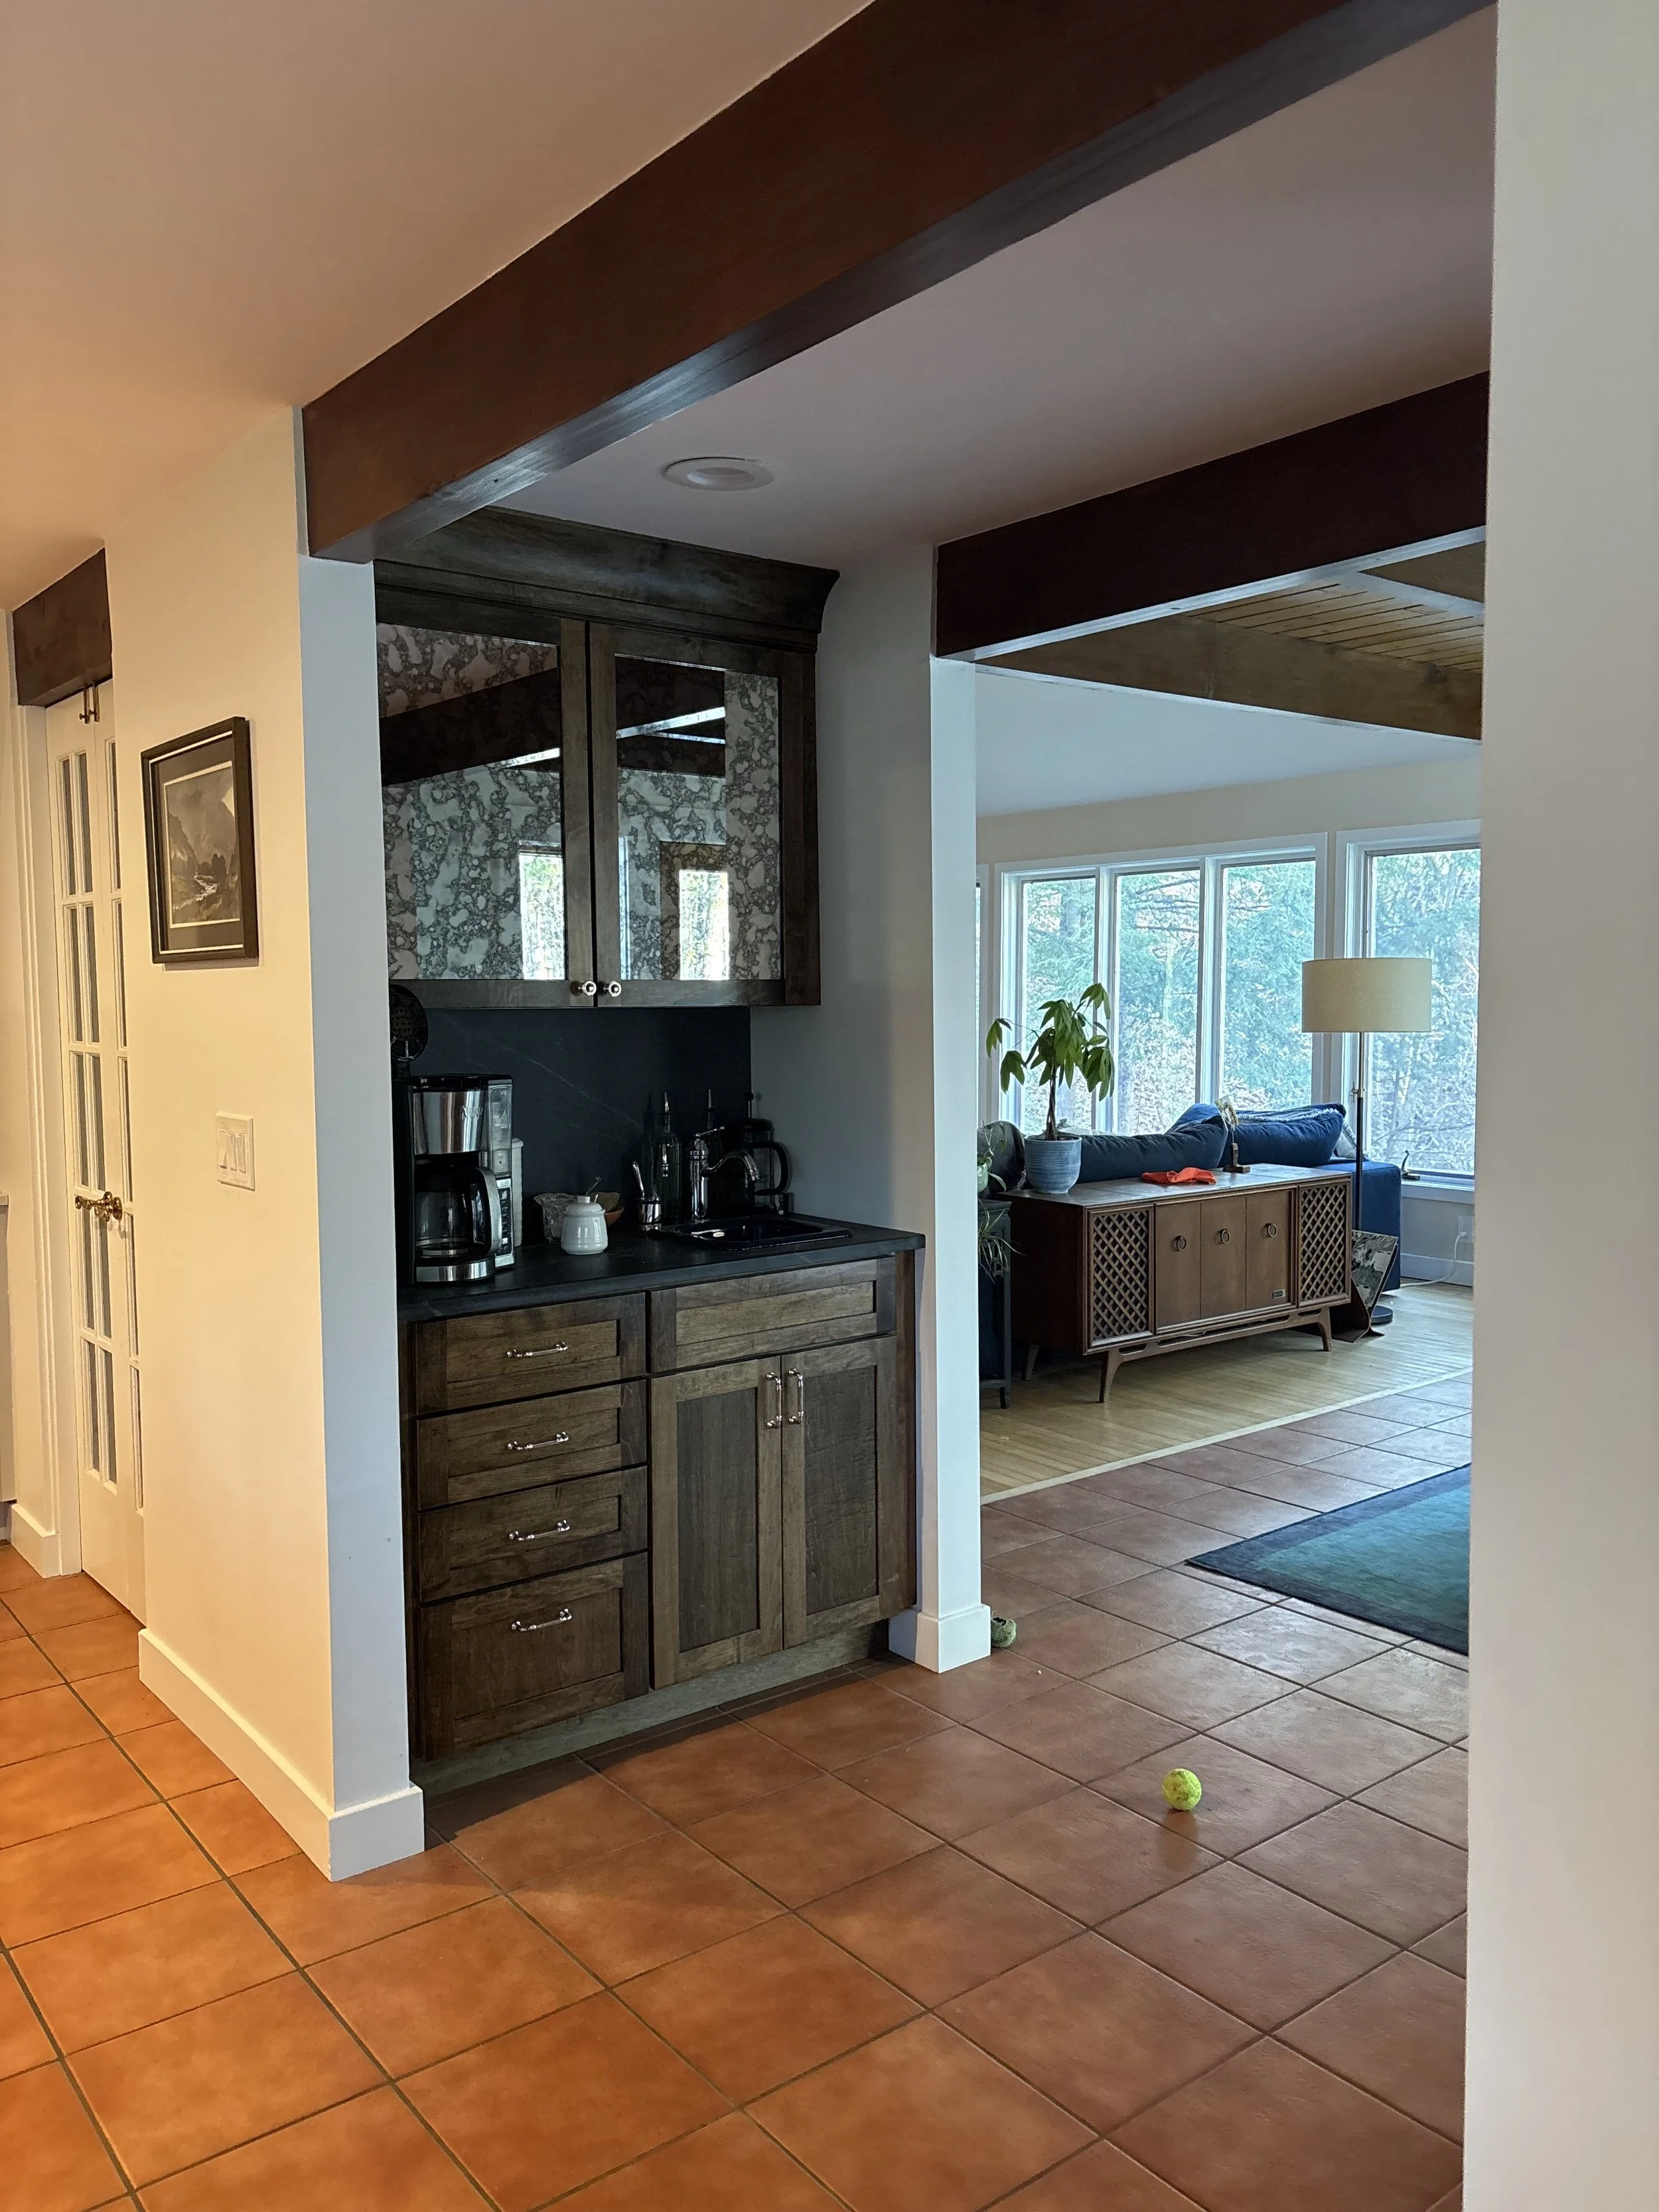
My home had this great little walkthrough area from the kitchen to the dining room. Outdated but useful space. When we decided to renovate downstairs, there were certain areas that just became a “if we’re gonna do it, we might as well do it now,” which obviously added unexpected expenses into the original budget. The wet and dry bar fit into this description…
I went back and forth on this area for a long time. I couldn’t decide if I wanted to match the cabinets to the mushroom color that the bordering kitchen cabinets were, to stain them to match the island or to go with a pop of color. Ultimately I decided to stain them the same dark walnut color as the island, in hopes of tying the space together. I actually loved the blue ceramic sink the original wet bar came with so we kept that and saved a few hundred bucks there. The uppers above the sink came with glass however I told the manufacturer to not bother sending glass because I knew I wanted either stained glass or an antique look instead. The contractor installed the upper cabinets and I let them sit without inserts for a few weeks so I could get a feel for what I wanted. As much as it drove me crazy to not have anything in there, leaving the space looking sloppy and unfinished, I’m so glad I gave myself some time to envision what I really wanted.
Products used with links:
Top Knobs Polished Nickel Cabinet Knobs - Note: These are on the pricier side so I’ve listed a dupe as well!
Top Knobs Polished Nickel Cabinet Pulls - 5”
Top Knobs Polished Nickel Cabinet Pulls - 4”
Top Knobs Polished Nickel Cabinet Pulls - 7”
Top Knobs Polished Nickel Fridge Pulls

Downstairs Renovations Part 3
As mentioned in my previous blog, the original downstairs laundry room and half bathroom were in the same room. Personally, I wasn’t a fan of this set up. Below is the original half bathroom and I don’t have a photo of the original laundry area but across from the toilet, was a closet with the washer and dryer in it.

Behind the sink/mirror, there used to be a closet in the hallway. I removed that closet, the toilet and sink then expanded the laundry room. We color drenched the space in “Essex Green” including the cabinets. We worked with a local carpenter, Bret, owner of “Wilton Rustics” to create the counter top seen below. My ex had a great idea to ask Bret to create a sink cover so that we had more counter space since the sink would be rarely used. I think it came out so great and is such a nice touch to the room. The one thing I still need to order is the green skins to go under the upper cabinets so that it truly blends in. It’s about the lowest item on my list to spend money on though!
Having three large dogs, on 10 acres with trails and a pond is a dream (or part of mine at least) however the amount of dirt that gets brought inside was starting to be gross and tedious to constantly clean in a larger home. Since the plumbing was already in this corner for the toilet, and we had the space, I decided to install the dog wash station. It took a bit of training but now when we come in from our walks, the dogs know to go right in and wait for their paws to be hosed down and dried off. The tile for the dog wash station is the same floor tile (zellige tile) I chose for the half bathroom. We ended up with plenty leftover so that all I needed to do was order a little extra to complete this job vs paying for return shipping or just having boxes of the tile sit around for years collecting dust. Similarly, our Soapstone kitchen Island counter tops had leftovers from the slab, so I asked the local company to cut it down to make the end and top caps for the dog wash station to save some money.

Products used with links:
Bronze Kitchen Faucet - Note: this product is now sold out but I linked a similar item, same brand which has been great
Wall Shelves - Note: We used leftover wood from the counters but I linked similar
Downstairs Renovations Part 2
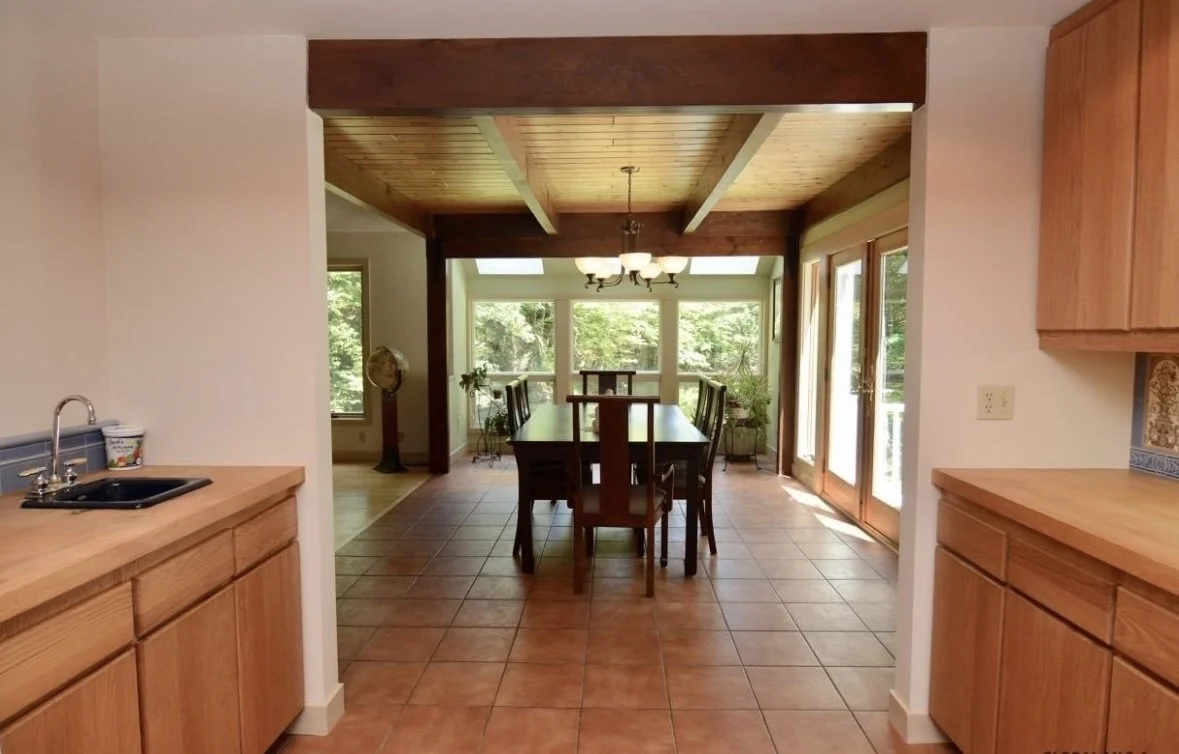
When you originally walk into our home from the garage, you were previously met with a small pantry straight ahead, to the left was the half bathroom with the laundry located in a closet in the bathroom. If you took a right and you went right into the kitchen with the oven/microwave almost directly next to the garage door. In the image below, you can get an idea of the layout. The room straight ahead with the wood window treatments is the original laundry/bathroom. The room behind the fridge was the pantry and to the right of the stove, beyond the oven/microwave was a small closet and the entrance to the garage.

Above is the original pantry. For such a large downstairs space, this area was poorly designed in my opinion. This original pantry was turned sideways, which is a bit hard to explain over writing but if you check out my TikTok’s, you can see me explaining how it was changed into our half bathroom. The original half bathroom, was transformed into a large laundry room with a dog wash station. With 3 large dogs, on 10 acres, this was one of the best choices I made. My dogs are now trained to go immediately into the tub after walks to get their paws sprayed down and dried. While this might seem excessive, the amount of dirt and germs this stops from coming inside my house is worth it’s weight in gold.
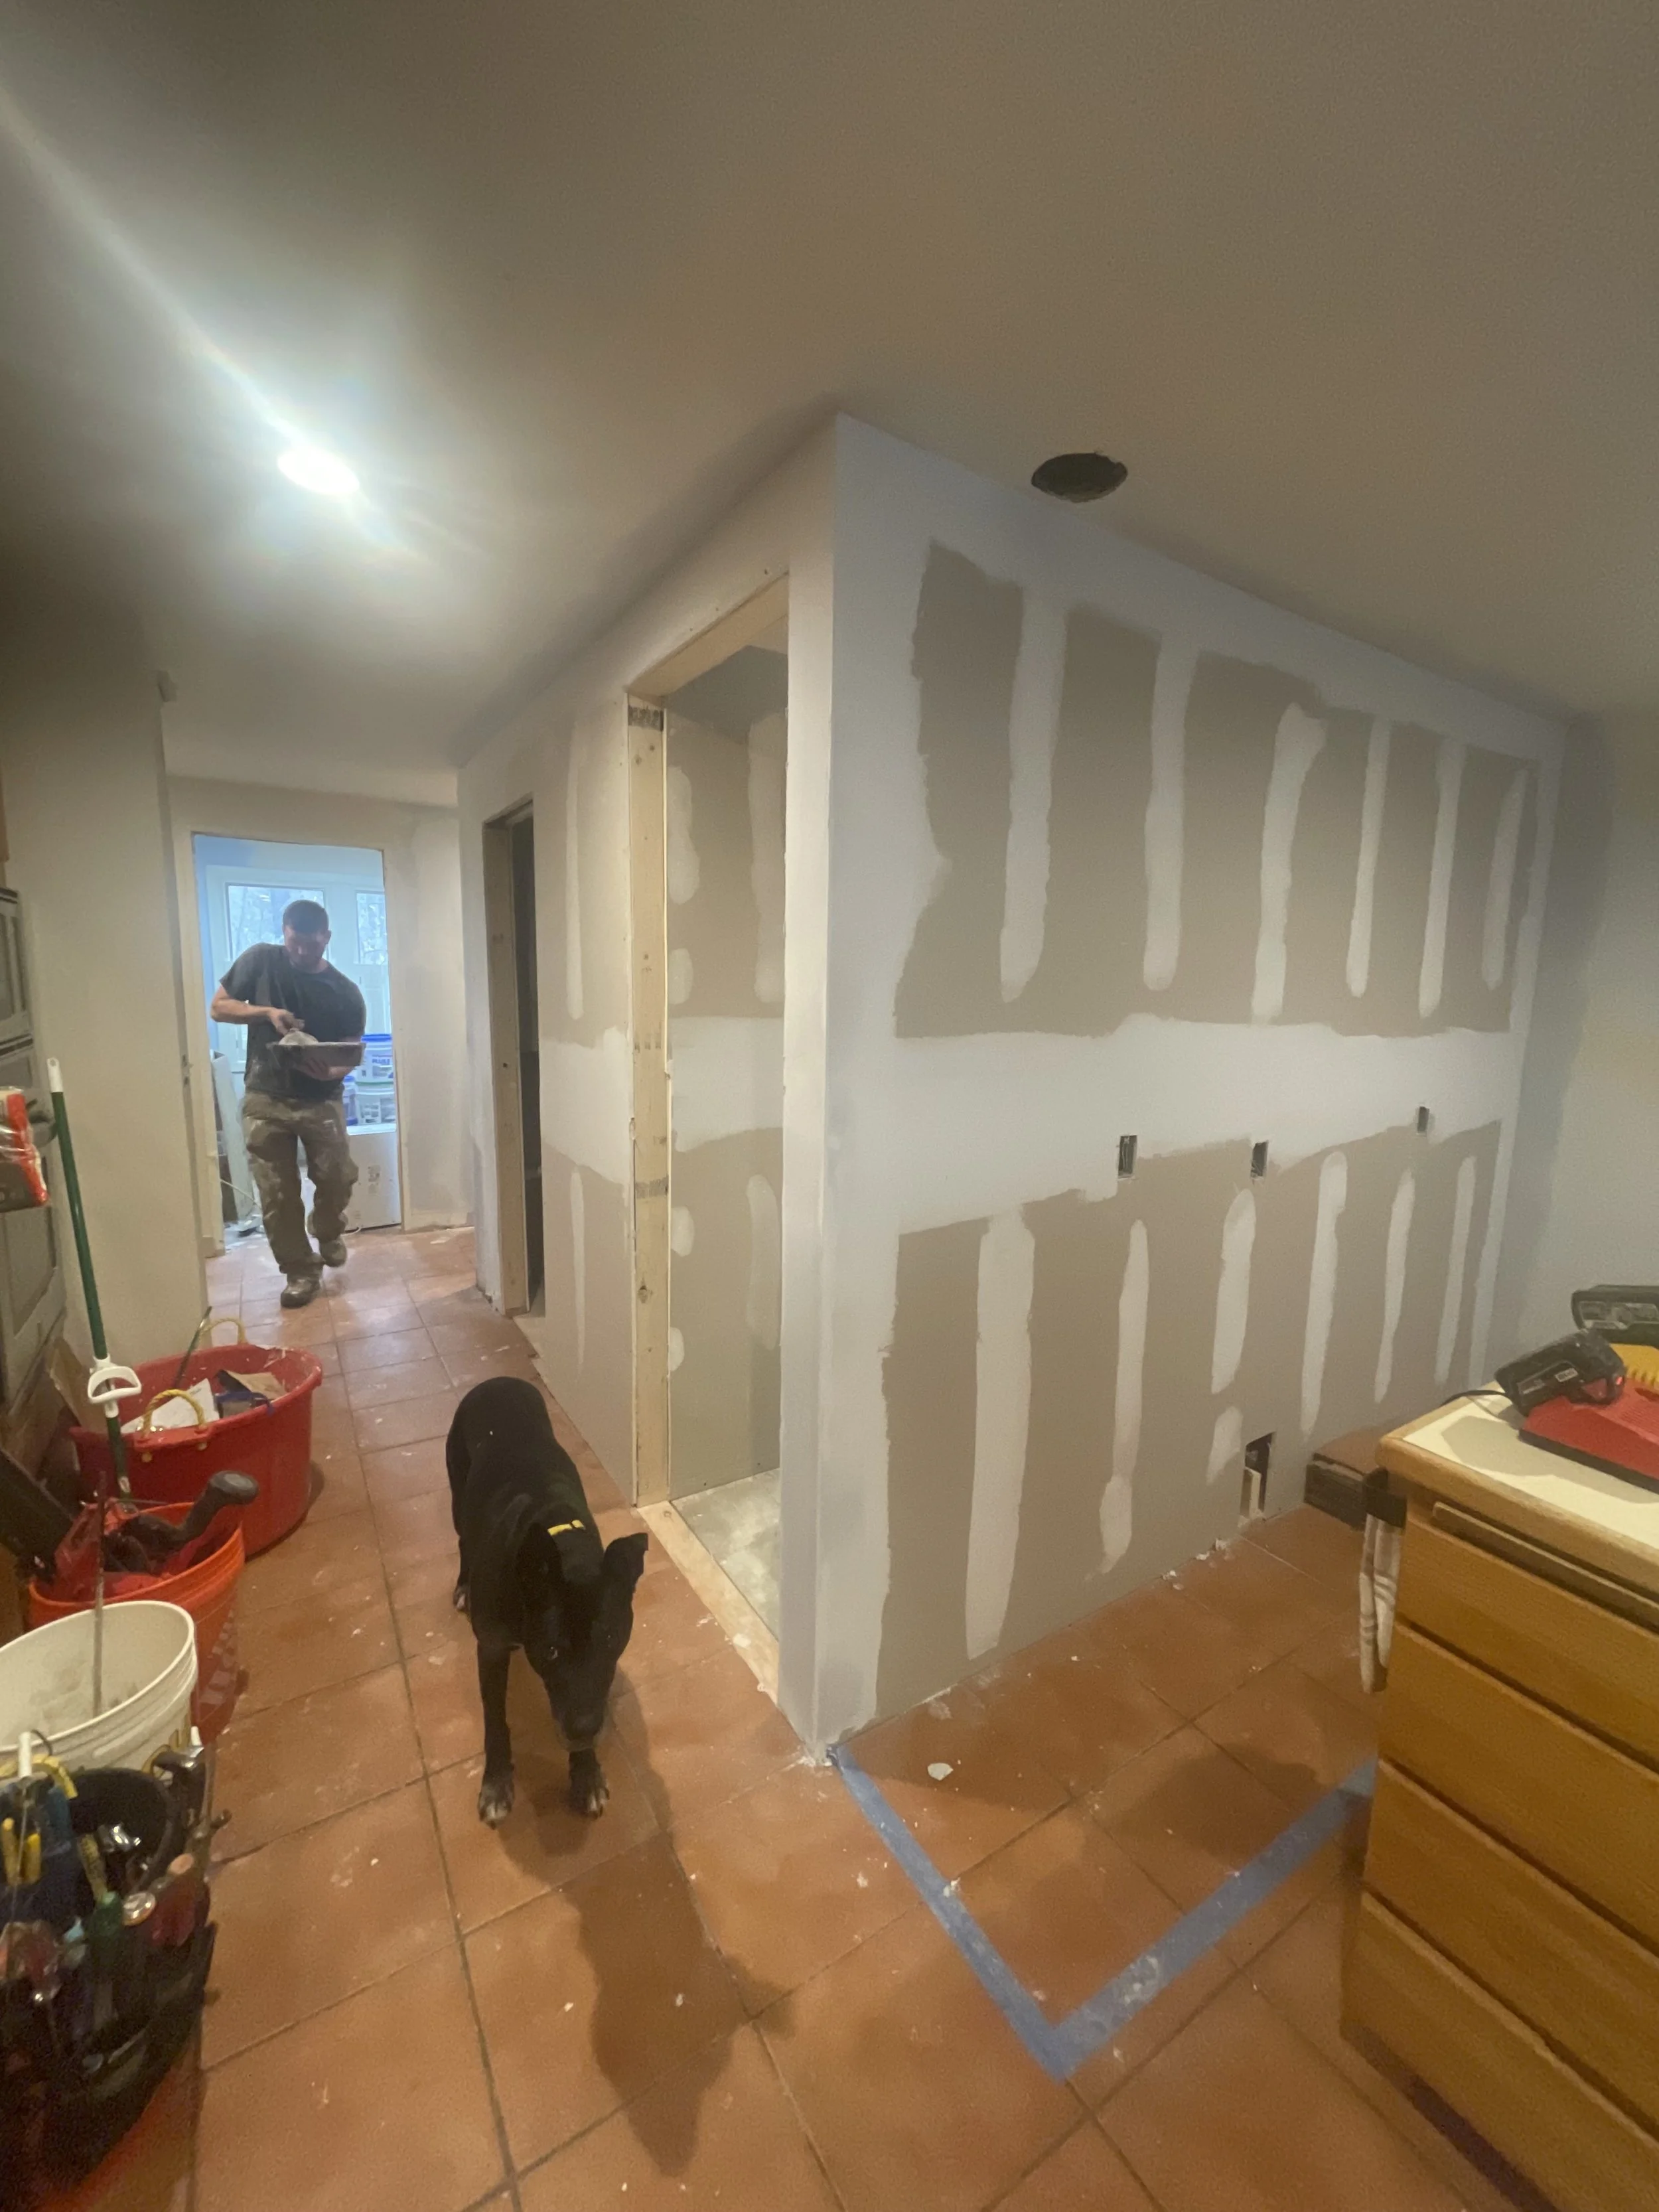
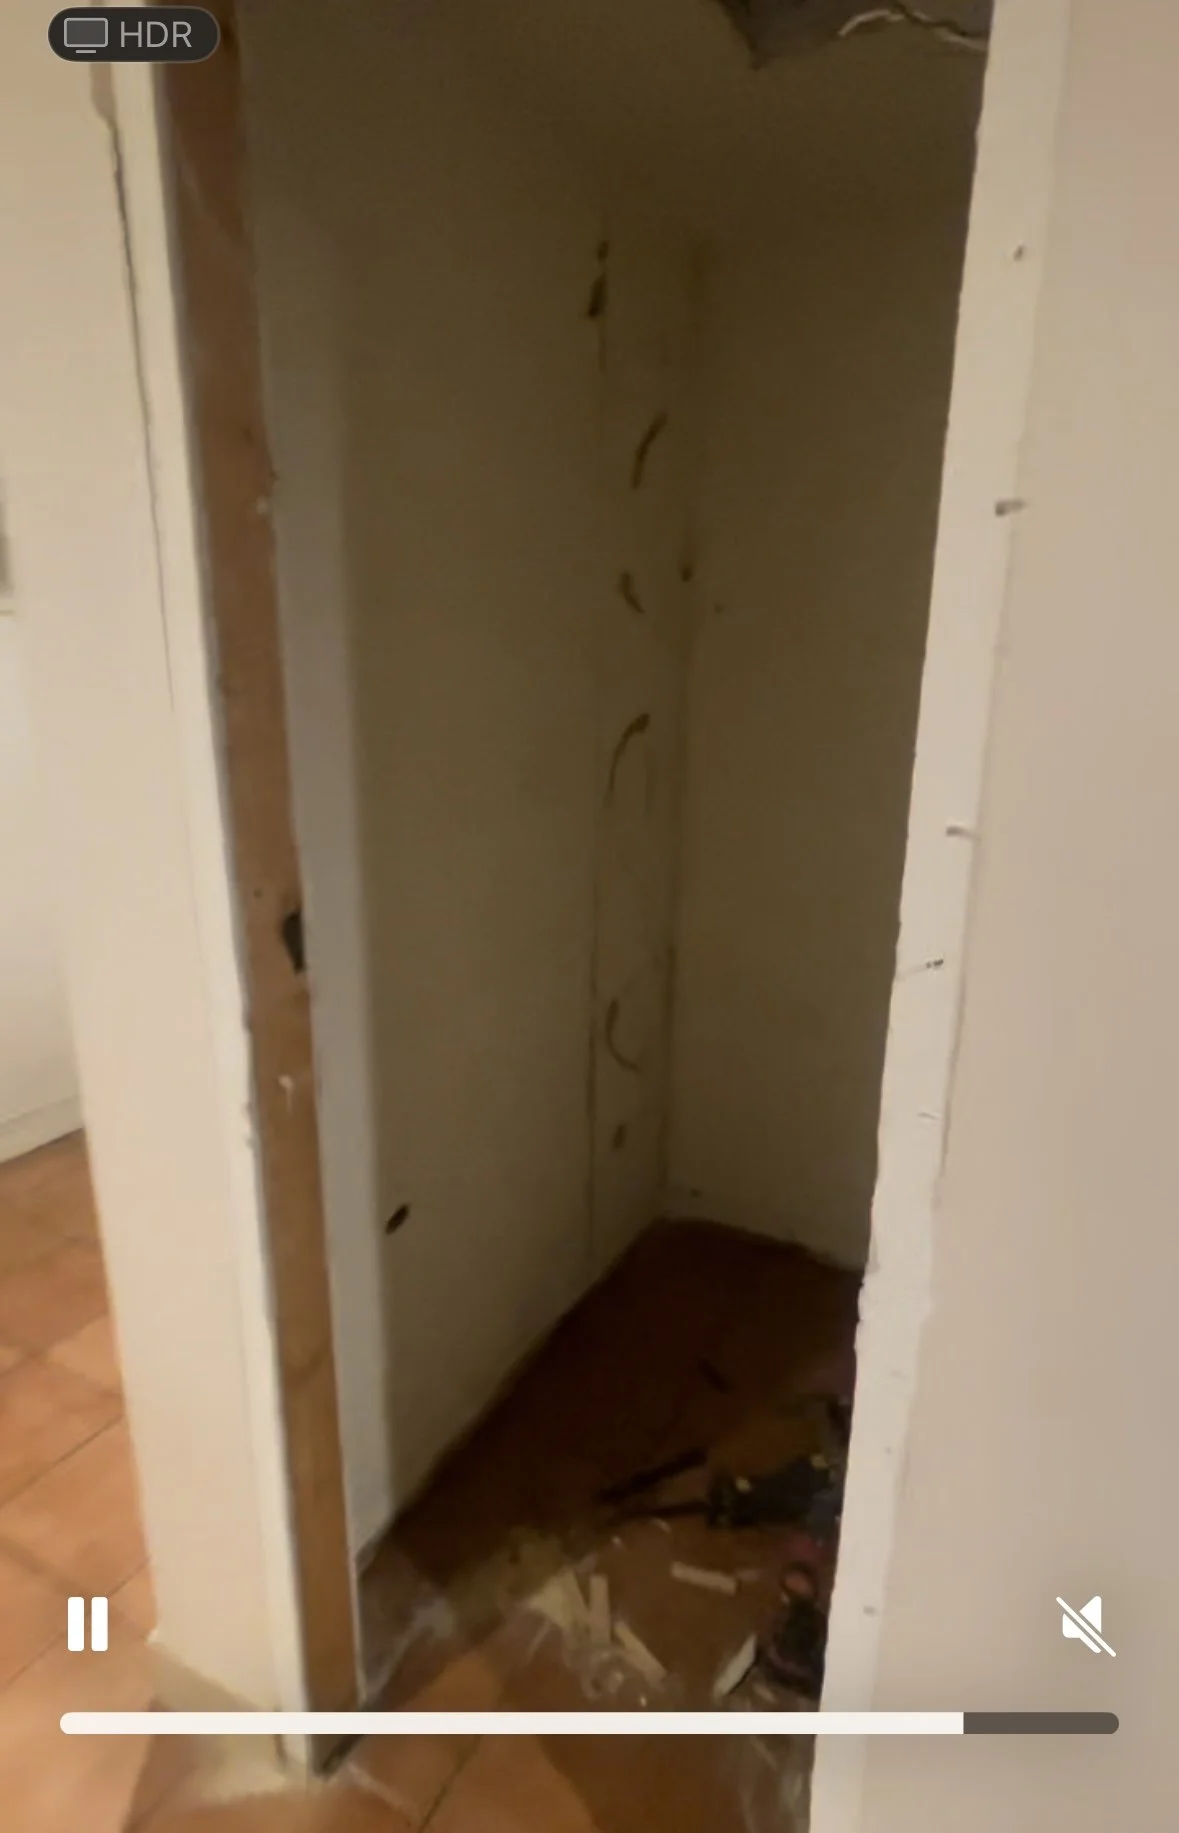
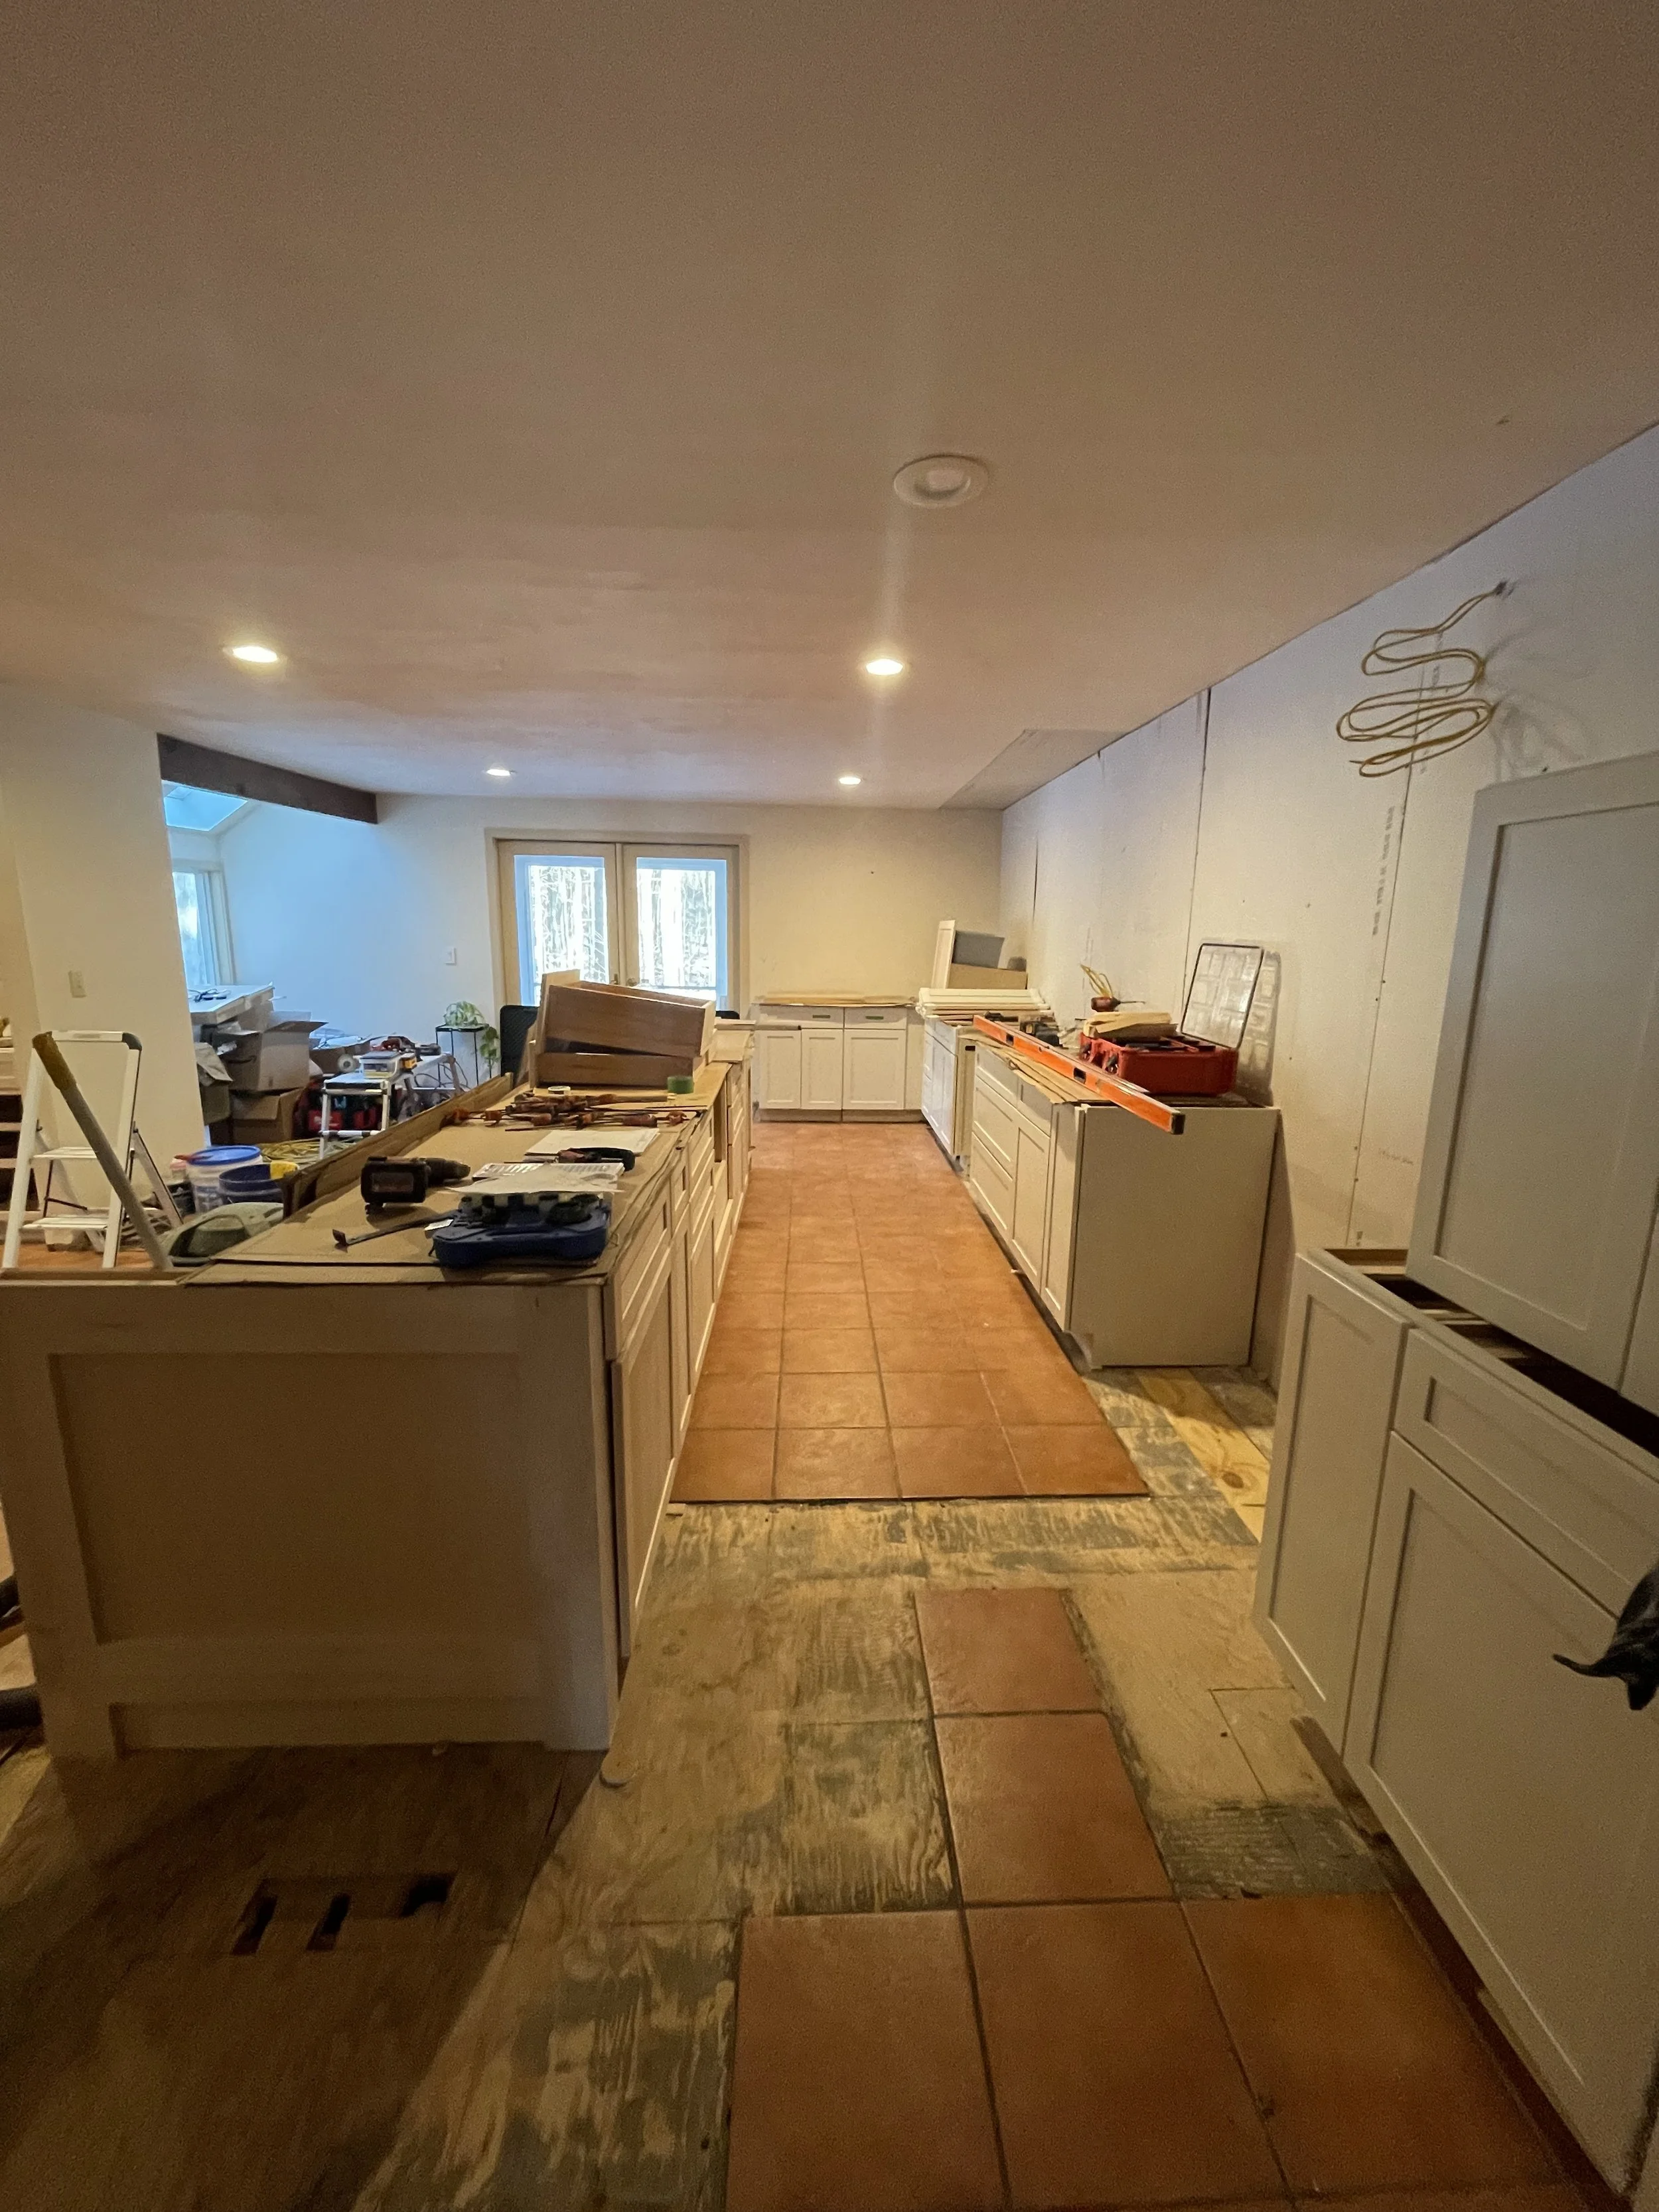
This is the new pantry framed out. You can’t see it here but it is L shaped and much larger than you would think based off of this photo. The below photo is the beginning of the mud room/entry way bench that now sits across from the half bath and pantry entrance. The right side of the bench, where the pantry cabinet is, was where the small closet used to be. The left side of the bench is where the oven/microwave used to be. The small wall was newly built to provide the sense of separation from the entry into the kitchen. I went back and forth on whether this was needed or to just butt the countertops to the left side of the green cabinet, but I’m really happy with the decision to add the wall.

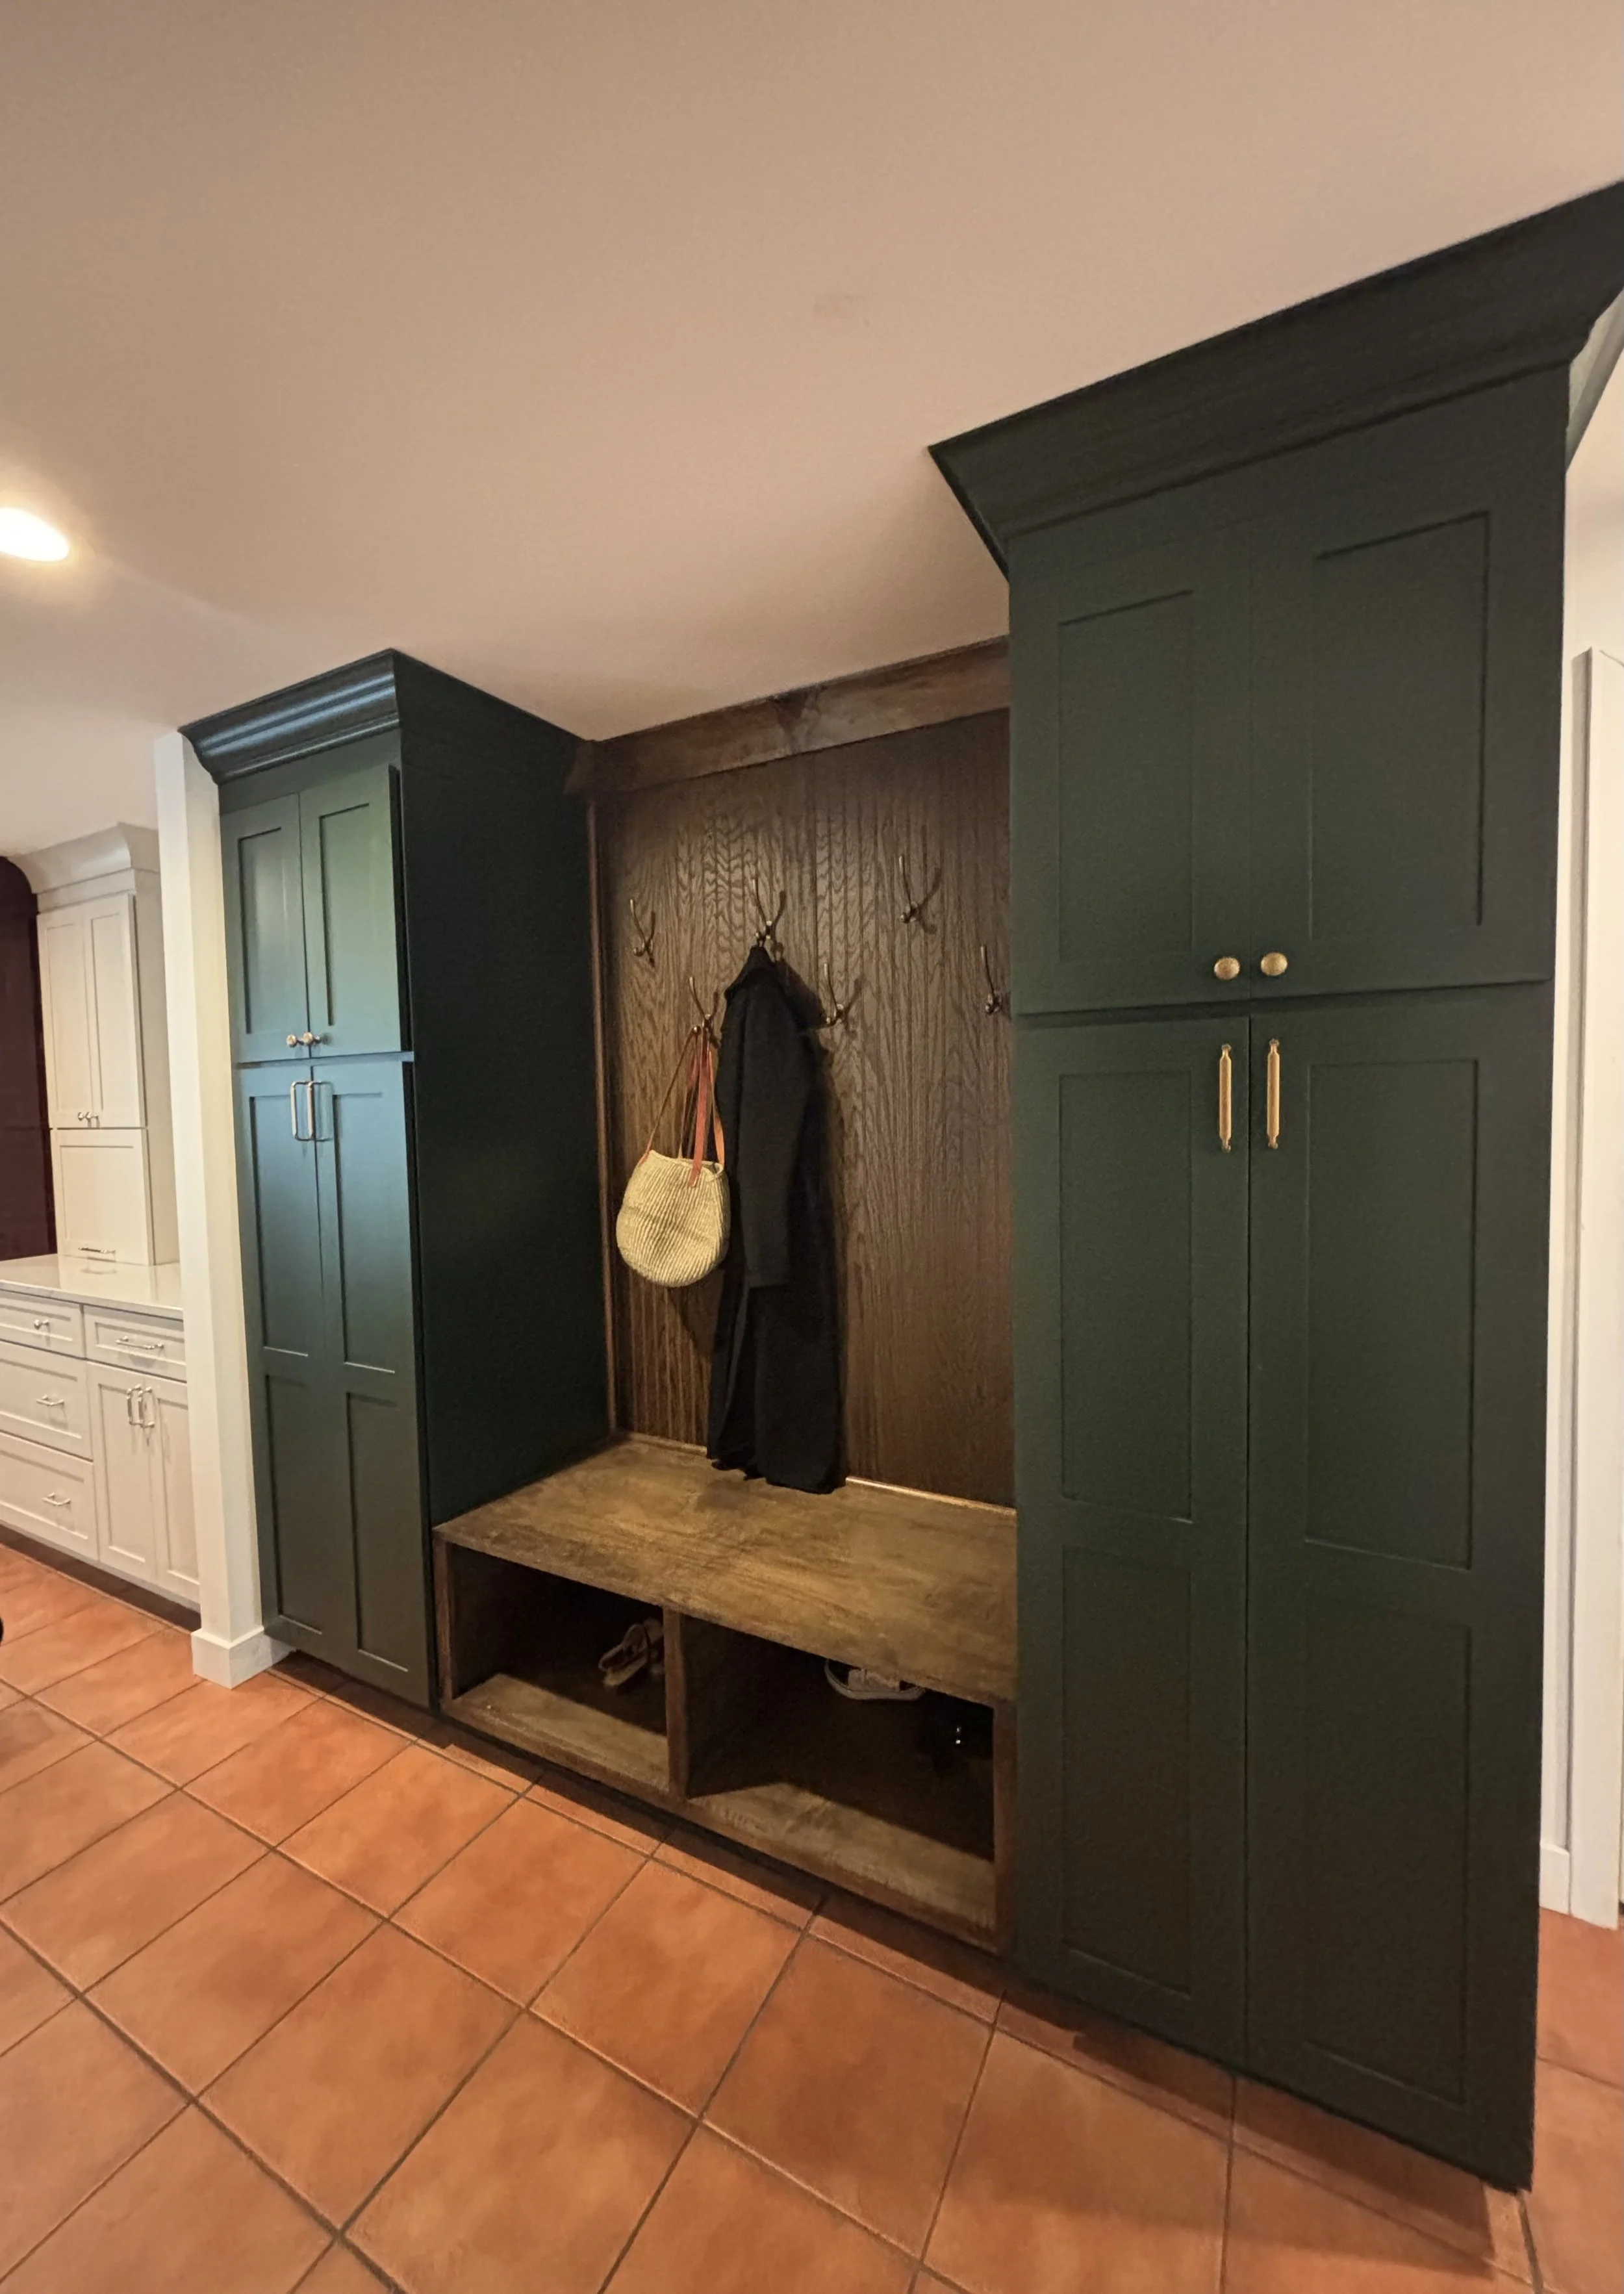
Above is the finished entry way bench / shoe storage and cabinets.

Above is the finished half bathroom vanity area.
Products used with links:
Bathroom Wall Sconce (set of 2)
Bathroom Faucet - Note: mine is sold out but I linked same brand / similar style
Second Home Purchase & the Start of Renovations
In 2021, my ex-husband and I bought our second home in upstate New York. The house, for the most part, was my dream home. Just a 5 minute drive outside of small city, nestled on 10-acres with a spring-fed pond and most importantly, no neighbors on top of us to complain about our pit bulls. It was definitely a risk, we did not make a lot of money at the time, but I crunched the numbers and excitedly showed my then husband. I will never forget asking him “should we go for it?!” and to my surprise, he replied “Fuck it. Let’s do it.” Within a week we had an accepted offer and listed our current home for sale. Within 2 days, we had sold our house (which we had just finished renovating the week prior) and off to the races we went. On the day of the closing, actually at the table surrounded by lawyers and the home owners, we unexpectedly learned that our type of loan required 14% down. I could’ve puked…our offer was only for 10% down as we needed the extra money for closing costs and renovations. To make matters worse, our closing cost were very (VERY) underestimated…I’m still not sure how we got here. We couldn’t walk away from the sale of our home, and we already had our deposit cashed on the new house. As I looked at the numbers in front of me, I checked our bank account under the table on my phone. We would be left with about $1,000 to our name. We didn’t have much choice, which in hind sight was a good thing so we signed, moved in and saved for the next few years to renovate. Here is the original kitchen.


I recognized immediately that this is perfectly functional and I would never complain about having this kitchen for a few years. I would be lying if I said I wasn’t sad to leave my brand new kitchen to this 80’s style home but I knew with patience, I can save and turn this space into my dream. Again, in hindsight, I’m so happy we waited. In three short years, my style had gone from “millenial gray” to a more timeless style. I’m still not sure what to call my new kitchen style but you can decide for yourself.
In 2023 I began to work with my friend Lorine, owner of Maitri House Designs, who is an amazing kitchen designer on some mock ups for the space. She has the patience of a goddess. We must’ve gone back and forth 50 times until I had what I thought was perfect. We removed the seating area shown above, expanded the entire kitchen, added 3 windows and a very large island, which turned out to be about double what the mock up below shows.
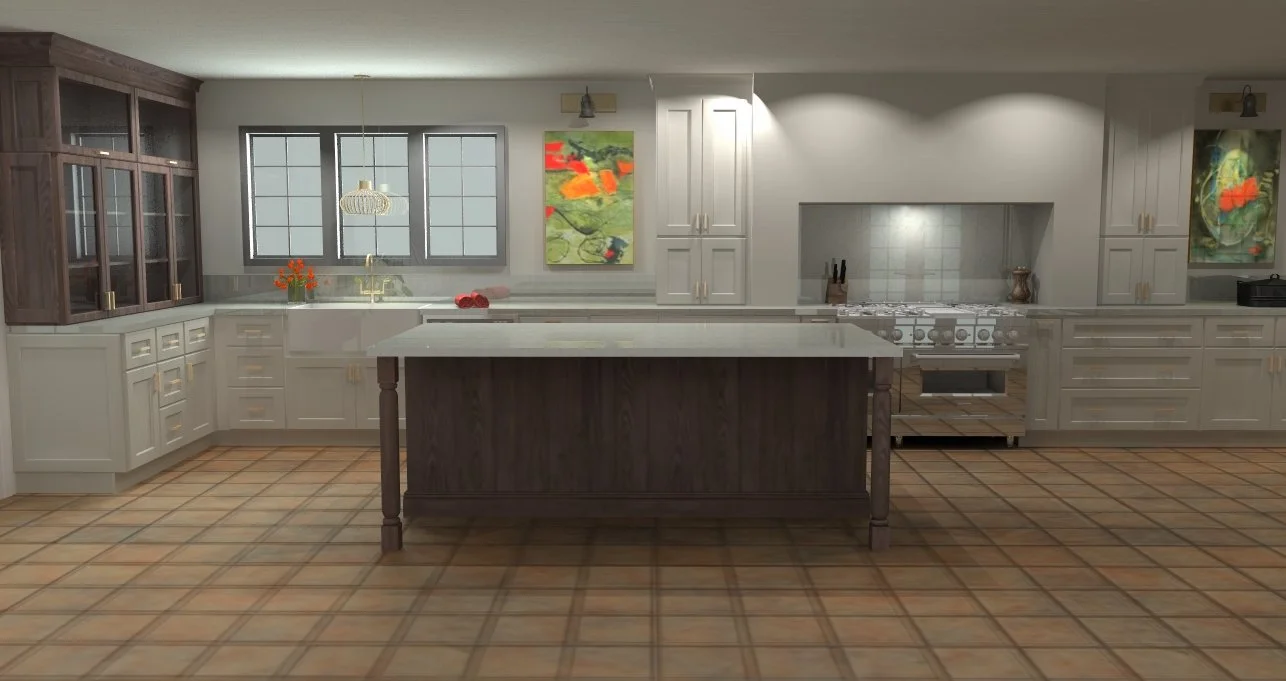
I saved the below viral Pinterest image of my dream hood but knew that might also take a few years as I couldn’t even imagine the cost. After I cover the other renovation areas of the downstairs, I will cover all costs in a future blog post.

What I didn’t realize about your “forever kitchen” design, is how long decisions take, how many hours you can pour into it and how expensive the project can get. I had my estimates, I’m a numbers person but my go to advice, is to double it. Which sounds outrageous… but is almost always accurate. You might think how!? How do you need to double it? And it may not be double, but we were going for timeless, the whole “spend on quality now” and forever. Outside of hiccups like plumbing, HVAC and unexpected other issues, it just adds up.

This return vent was an unexpected hiccup that we had to find a solution for because it was right in the middle of the new pantry.

One thing you’ll notice is the original terracotta floors stayed. While they were definitely not my first choice, after hearing about an 80k price tag to redo the floors with wood, I suddenly loved the terracotta. I searched high and low for matching pieces to replace a good amount that were underneath the original peninsula island and other areas. The pieces I found were a touch darker and they needed to be cut down about an inch but it would have to do!

I’ll save you months of photos and boring updates just show you the final reveal. I can dive into more details later on, things I love, things I would still change (makes me want to cry thinking about changing items already) and cost.


I’ll go into details about my do’s and don’ts in another post, but biggest design mistake in this kitchen is that the cabinets to the left and right of the panel fridge, are not flush with the front of fridge. A mistake that one day, will cost me about $8,000 to replace with floor to ceiling pantry cabinets similar to the green entryway cabinets to the left and right of the bench.

Products used with links:
Top Knobs Polished Nickel Cabinet Knobs - Note: These are on the pricier side so I’ve listed a dupe as well!
Top Knobs Polished Nickel Cabinet Pulls - 5”
Top Knobs Polished Nickel Cabinet Pulls - 4”
Top Knobs Polished Nickel Cabinet Pulls - 7”
Top Knobs Polished Nickel Fridge Pulls
Kohler Widespread Artifacts Kitchen Faucet
Day one of your interior design preference
Introduction
In recent years, there has been a noticeable shift in the world of interior design. No longer confined to the realms of high-end professionals or trendy influencers, interior design has become accessible to everyone, especially for moms and middle-aged women looking to create a space that reflects their unique personalities and lifestyles. Whether you’re a busy mom seeking a sanctuary amidst the chaos or a middle-aged woman redefining her space after a life transition, this blog post will guide you through the journey of beginning in interior design.
Discovering Your Style
The first step in your interior design journey is discovering your personal style. This process can be both exciting and daunting, particularly for those who may not have considered their aesthetic preferences before. Start by gathering inspiration from various sources such as magazines, Pinterest boards, or Instagram accounts dedicated to interior design. Pay attention to colors, patterns, and layouts that resonate with you.
Consider creating a mood board to visually organize your ideas. This can be a physical board with cutouts or a digital collection of images that inspire you. Remember, your style should reflect your personality, so don’t shy away from mixing elements that speak to your heart.
Functional Spaces for Family Life
As a mom, practicality is often at the forefront of your design decisions. It’s essential to create spaces that not only look good but also function well for your family’s needs. Think about how your family uses different areas of your home. Do you need a playroom that can double as a guest room? Or perhaps a cozy reading nook where you can escape for a few moments of peace?
Incorporate multi-functional furniture and storage solutions to keep your space organized and clutter-free. Opt for durable materials that can withstand the rigors of family life while still maintaining an elegant look. By prioritizing functionality, you’ll create an environment that fosters connection and comfort.
Color Theory and Emotional Impact
Color plays a vital role in interior design, influencing mood and atmosphere. When selecting a color palette, consider the emotions you want to evoke in each room. Soft blues and greens can promote calmness, making them perfect for bedrooms or relaxation areas. Warm tones like yellows and oranges can energize a space, ideal for kitchens or playrooms.
For moms and middle-aged women, it’s crucial to select colors that resonate with your lifestyle. You may want to create a soothing retreat in your bedroom, while the living room could benefit from vibrant colors that spark joy and conversation. Don’t hesitate to experiment with accent walls or colorful decor to add personality to your space.
Personal Touches and DIY Projects
One of the most rewarding aspects of interior design is the opportunity to personalize your space. Incorporate family photos, heirlooms, or artwork that tells your story. These personal touches will make your home feel unique and inviting.
Moreover, consider engaging in DIY projects to add character and creativity to your home. Whether it’s painting an old piece of furniture, creating custom artwork, or upcycling thrift store finds, these projects can be a fun way to express your style while keeping costs down.
Finding Community and Resources
As you embark on your interior design journey, don’t hesitate to seek out community and resources. Online forums, local workshops, or social media groups can provide valuable support and inspiration. Connecting with others who share your passion can motivate you and offer fresh ideas.
Additionally, consider following interior design blogs, podcasts, or YouTube channels that cater to moms and middle-aged women. These platforms often provide practical tips tailored to your unique needs, making it easier to navigate your design journey.
Conclusion
Starting your journey in interior design can be a transformative experience, especially for moms and middle-aged women looking to create spaces that reflect their identities and lifestyles. By discovering your style, prioritizing functionality, understanding color theory, personalizing your space, and seeking community support, you can design a home that not only looks beautiful but also feels like a true reflection of you. Embrace the journey, and remember that every step you take in creating your space is a step toward a more intentional and fulfilling life.
In recent years, there has been a noticeable shift in the world of interior design. No longer confined to the realms of high-end professionals or trendy influencers, interior design has become accessible to everyone, especially with DIY options. Whether you’re a busy mom seeking a sanctuary amidst the chaos or a middle-aged woman redefining her space after a life transition, this blog post will guide you through the journey of beginning in interior design.
Discovering Your Style
The first step in your interior design journey is discovering your personal style. This process can be both exciting and daunting, particularly for those who may not have considered their aesthetic preferences before. Start by gathering inspiration from various sources such as magazines, Pinterest boards, or Instagram accounts dedicated to interior design. Pay attention to colors, patterns, and layouts that resonate with you.
Consider creating a mood board to visually organize your ideas. This can be a physical board with cutouts or a digital collection of images that inspire you. Remember, your style should reflect your personality, so don’t shy away from mixing elements that speak to your heart.
Functional Spaces for Family Life
It’s essential to create spaces that not only look good but also function well for your family’s needs. Think about how your family uses different areas of your home. Do you need a playroom that can double as a guest room? Or perhaps a cozy reading nook where you can escape for a few moments of peace?
Incorporate multi-functional furniture and storage solutions to keep your space organized and clutter-free. Opt for durable materials that can withstand the rigors of family life while still maintaining an elegant look. By prioritizing functionality, you’ll create an environment that fosters connection and comfort.
Color Theory and Emotional Impact
Color plays a vital role in interior design, influencing mood and atmosphere. When selecting a color palette, consider the emotions you want to evoke in each room. Soft blues and greens can promote calmness, making them perfect for bedrooms or relaxation areas. Warm tones like yellows and oranges can energize a space, ideal for kitchens or playrooms. You may want to create a soothing retreat in your bedroom, while the living room could benefit from vibrant colors that spark joy and conversation. Don’t hesitate to experiment with accent walls or colorful decor to add personality to your space.
Personal Touches and DIY Projects
One of the most rewarding aspects of interior design is the opportunity to personalize your space. Incorporate family photos, heirlooms, or artwork that tells your story. These personal touches will make your home feel unique and inviting.
If you’re on a budget, consider engaging in DIY projects to add character and creativity to your home. Whether it’s painting an old piece of furniture, creating custom artwork, or upcycling thrift store finds, these projects can be a fun way to express your style while keeping costs down.
In the end
As you embark on your interior design journey, don’t hesitate to seek out community and resources. Online forums, local workshops, or social media groups can provide valuable support and inspiration. Connecting with others who share your passion can motivate you and offer fresh ideas. By discovering your style, prioritizing functionality, understanding color theory, personalizing your space, and seeking community support, you can design a home that not only looks beautiful but also feels like a true reflection of you. And don’t forget, your style will likely change as time goes on. I like to keep the big items (kitchen, flooring, large furniture) the investment “pieces” and every few years, work within my budget to paint, thrift decor and trinkets. Change is good!